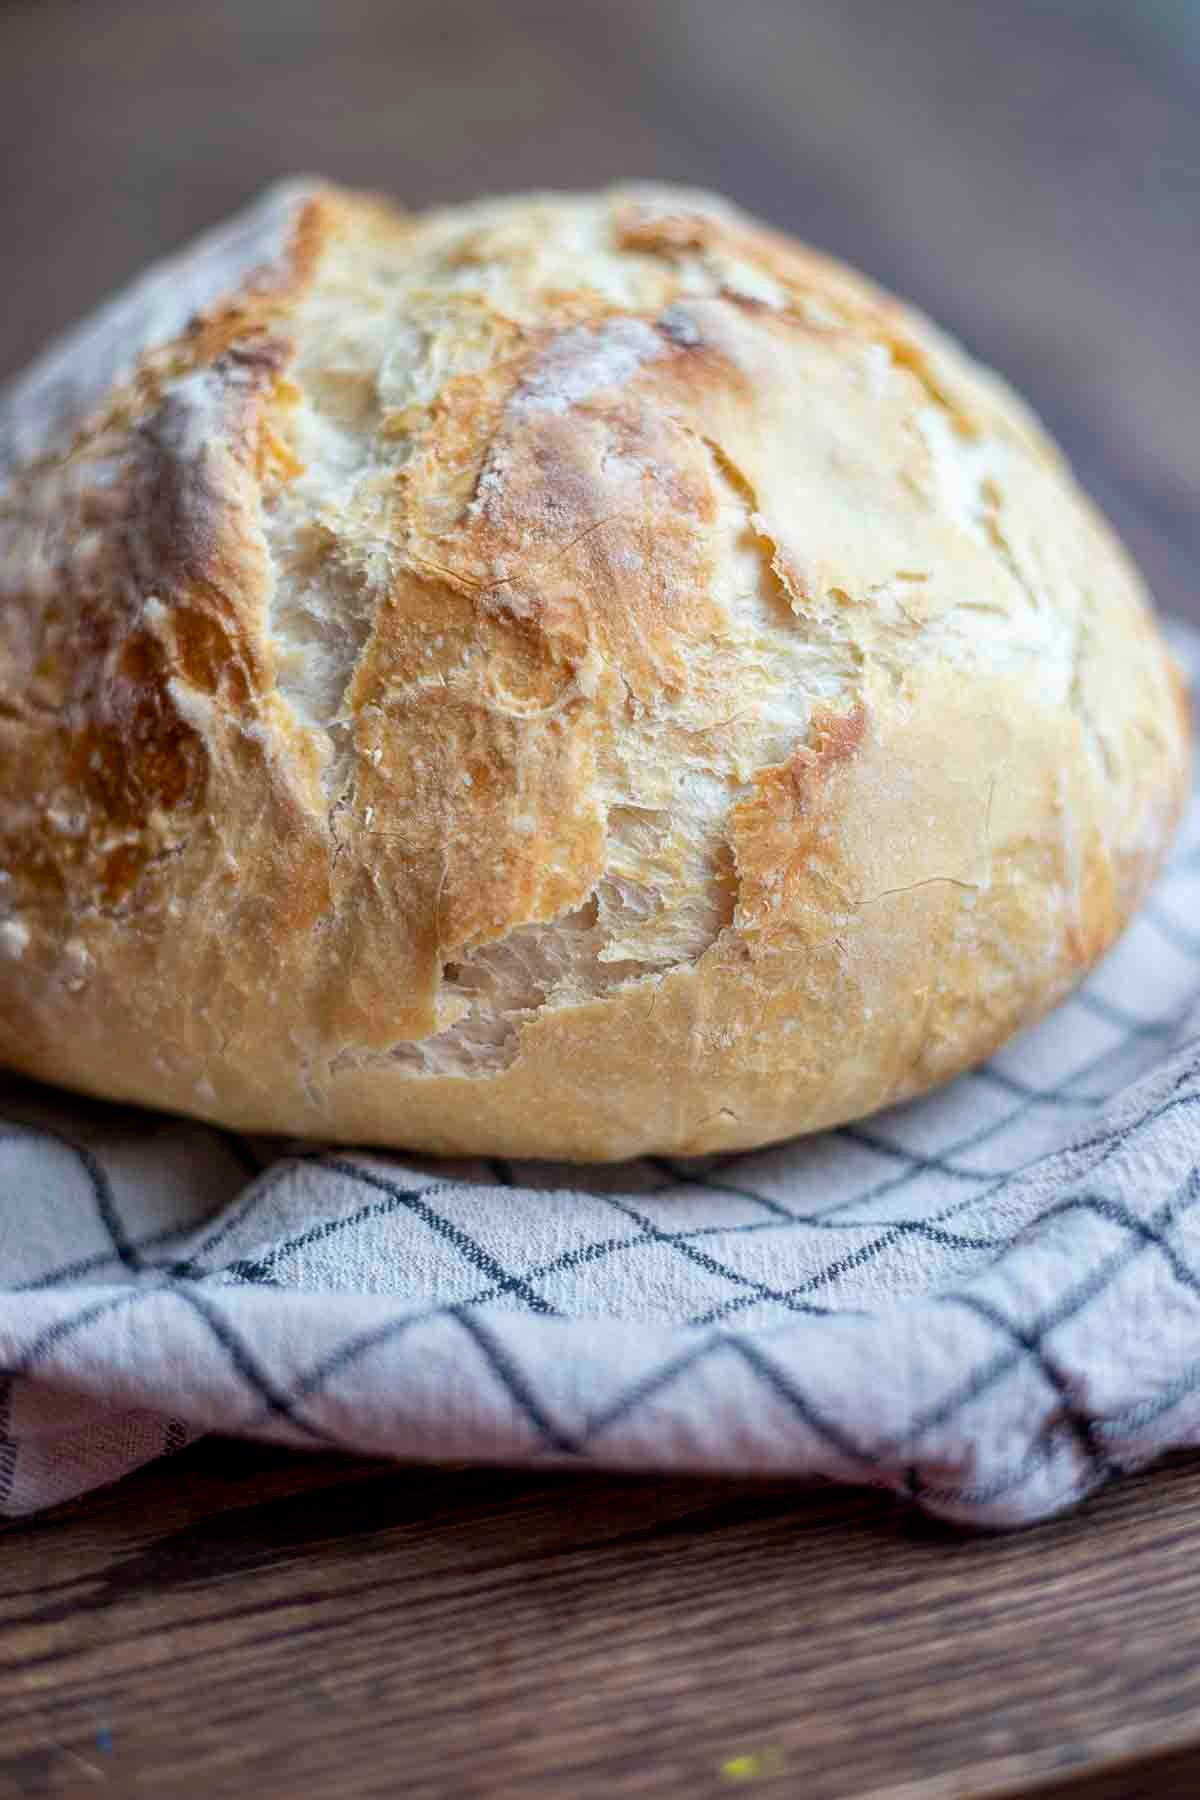
Baking fresh bread at home often feels like a giant challenge reserved only for professional bakers who spend years mastering complicated techniques. However, this specific recipe completely changes that mindset by showing you how simple home baking can actually be. This recipe is all about making the absolute easiest no knead sourdough discard bread that turns out amazingly soft on the inside with a wonderfully crispy outer crust. Sourdough discard is simply the portion of unfed sourdough starter that you usually throw away when maintaining your starter culture. Instead of tossing that valuable culture into the trash, you can use it to create a deeply flavorful loaf of bread with almost zero physical effort. You do not need any fancy bakery equipment, special mixing machines, or hours of physical labor kneading dough on a counter. Everything comes together using basic kitchen tools that you already have lying around in your drawers. If you have ever wanted to enjoy the smell of fresh bakery style bread filling your home, this recipe is your perfect starting point.
People all over the world absolutely love this bread recipe because it removes all the stress and confusion usually connected with traditional sourdough baking. Traditional sourdough baking requires strict feeding schedules, intense folding routines, and constant temperature monitoring that can easily overwhelm a beginner. This no knead method relies on time and basic chemistry to build structure naturally while you sit back and relax. You simply mix your basic ingredients in a bowl, let time do all the heavy work of developing gluten, and then bake it to golden perfection. Busy parents, working professionals, and kitchen novices adore this recipe because it fits seamlessly into a busy daily routine. You can mix the dough in less than ten minutes before bed and wake up to dough that is completely ready to shape and bake. The pure simplicity of mixing four simple ingredients together and getting a glorious loaf of rustic bread makes people feel incredibly accomplished every single time.
There are so many wonderful reasons and special moments to make this comforting sourdough discard bread in your own home. On a cold rainy morning or a quiet weekend afternoon, the rich warm smell of baking bread creates an atmosphere of deep comfort and joy that money simply cannot buy. Sharing a warm slice slathered with rich creamy butter or sweet fruit jam brings family members together around the kitchen table in a truly heartwarming way. From a health and fitness standpoint, making your own bread gives you absolute control over every single ingredient entering your body. Commercial store bought breads are often packed with artificial preservatives, unnecessary sugars, softeners, and chemical additives that can irritate your stomach. By baking this loaf at home, you nourish your body with wholesome unbleached flour, pure water, sea salt, and gut friendly fermented discard. It serves as a healthy carbohydrate source that provides clean energy for your daily activities without causing heavy bloating.
Whether you are looking to reduce food waste in your kitchen or simply want to eat cleaner foods, this recipe hits every single goal effortlessly. Throwing away sourdough discard every single week can make any home baker feel guilty about wasting good flour and time. Using that leftover starter in a no knead recipe gives your discard a whole new life while adding a subtle tangy flavor that enhances the overall taste profile. The light sour note pairs beautifully with hearty savory soups, crisp fresh salads, pasta dishes, or rich evening stews. It also makes the absolute best toasted bread for breakfast sandwiches, garlic toast, or simple avocado slices topped with red pepper flakes. Once you experience how easy it is to transform leftover starter into a gorgeous golden loaf, you will never want to buy expensive factory made loaves from the supermarket ever again. This recipe builds immense confidence in the kitchen while treating your loved ones to honest food made with pure care.
Ingredients You Will Need
To make this delicious loaf, gather the following simple ingredients with exact measurements:
- Unbleached all purpose flour or bread flour: 400 grams (about 3 and 1/4 cups)
- Sourdough discard (unfed, straight from the refrigerator or room temperature): 150 grams (about 3/4 cup)
- Warm water (filtered water works best, temperature around 90 degrees Fahrenheit): 300 grams (about 1 and 1/4 cups)
- Instant yeast or active dry yeast: 4 grams (about 1 teaspoon)
- Fine sea salt or kosher salt: 10 grams (about 1 and 1/2 teaspoons)
- Olive oil (optional, just for coating the bowl): 1 tablespoon
Step by Step Method
Step 1: Prepare Your Work Area and Measure Ingredients
Start by clearing a clean space on your kitchen counter so you can work comfortably. Gather a large glass or ceramic mixing bowl, a sturdy wooden spoon or silicone spatula, a set of digital kitchen scales or measuring cups, and a clean kitchen towel. Using a digital kitchen scale is highly recommended for baking because measuring ingredients by weight ensures consistent and perfect results every single time.
Step 2: Combine the Liquid and Sourdough Discard
Pour the warm water into your large mixing bowl. Make sure the water is comfortably warm to the touch, not hot, because hot water can kill the yeast organisms. Add the sourdough discard directly into the warm water. Use your wooden spoon or a whisk to gently stir the discard and water together until the discard mostly dissolves and the liquid looks cloudy and milky.
Step 3: Mix in the Dry Ingredients
Measure your instant yeast and fine sea salt, then add them directly into the cloudy liquid mixture. Stir well so the yeast and salt spread evenly through the liquid. Next, add all of the flour into the bowl at once. Use your spoon to mix everything together using firm circular motions. Make sure you scrape the sides and the very bottom of the bowl so no dry flour pockets remain hidden. The resulting dough will look quite shaggy, wet, and sticky, which is completely normal for a proper no knead dough recipe. Do not add extra flour even if it looks wet.
Step 4: First Rise and Gluten Development
Lightly coat the inside edges of the bowl with a drizzle of olive oil if you wish, or simply leave the dough as it is. Cover the mixing bowl tightly with plastic wrap, a silicone lid, or a damp kitchen towel. Place the covered bowl in a warm, draft free spot in your kitchen. Allow the dough to rest undisturbed for about 2 to 3 hours at room temperature. During this quiet period, the yeast will ferment the natural sugars, and the water will fully hydrate the flour to build strong gluten strands automatically without any manual kneading.
Step 5: Optional Cold Fermentation for Extra Flavor
If you have extra time and want a richer flavor profile, you can transfer the covered bowl into your refrigerator for 8 to 24 hours after the initial room temperature rise. Cold fermentation slows down the yeast activity while allowing beneficial bacteria to create a deeper sourdough flavor and a lighter interior crumb structure. If you are in a rush, you can skip this refrigeration step entirely and move straight to baking.
Step 6: Shape the Dough
Preheat your oven to 450 degrees Fahrenheit (230 degrees Celsius). While the oven is heating up, place a heavy iron Dutch oven with its lid on inside the oven so it becomes piping hot. Lightly dust your kitchen counter or a piece of parchment paper with a small handful of flour. Gently tip the puffy dough out of the bowl onto the floured parchment paper. Using floured hands, gently pull the edges of the dough toward the center to form a smooth, round ball shape. Flip the dough ball over so the smooth seam side faces upward. Cover the shaped dough loosely with a towel and let it rest for 30 minutes while the oven heats up completely.
Step 7: Score the Top of the Bread
Just before baking, use a very sharp knife or a razor blade to make one clean slash across the top surface of the dough ball. This single cut is called scoring. Scoring allows steam to escape cleanly during the initial baking phase, which helps the loaf expand high and prevents unpredictable cracking on the sides of your bread.
Step 8: Bake with the Cover On
Carefully remove the hot Dutch oven from your preheated main oven using heavy oven mitts. Place the hot pot on a heat safe trivet or wooden board. Using the edges of the parchment paper like handles, carefully lift your shaped dough and lower it into the center of the hot Dutch oven. Put the lid back onto the Dutch oven tightly. Return the covered pot to the oven and bake for 30 minutes. The trapped steam inside the closed pot keeps the outer dough moist so the loaf can rise to its maximum height while creating a thin crust.
Step 9: Uncover and Crispen the Crust
After 30 minutes of baking with the lid on, carefully remove the lid from the Dutch oven. You will see a pale, beautifully expanded loaf of bread. Continue baking the bread uncovered for another 15 to 20 minutes. During this second phase, the outer crust will transform into a gorgeous deep golden brown color while becoming delightfully crispy and crunchy.
Step 10: Cool Completely Before Slicing
Once the loaf turns a rich golden color and sounds hollow when you tap the bottom crust, remove the Dutch oven from the main oven. Lift the finished bread out of the pot using the parchment paper edges and transfer it onto a wire cooling rack. Allow the bread to cool completely for at least one full hour before slicing. Slicing into warm bread is very tempting, but cutting too early traps steam inside and can make the interior texture gummy and dense.
Why This Recipe Is Special
This no knead sourdough discard bread stands out from standard homemade bread recipes for several compelling reasons. First and foremost, it offers incredible convenience for busy modern lifestyles. You get to skip the tiring fifteen minute manual kneading session that deters so many people from baking at home. The long rest period allows water molecules to naturally break down proteins in the flour and create elastic gluten structures on their own, yielding professional bakery quality texture with zero physical labor.
From a health perspective, using sourdough discard brings wonderful benefits to your digestive system. The fermentation process breaks down complex starches and phytic acid found naturally in wheat grain flour. Phytic acid can sometimes block your body from absorbing important minerals like zinc, magnesium, and iron. By neutralizing phytic acid through long fermentation, this bread becomes significantly easier to digest compared to fast rising commercial white breads. Many people who experience mild stomach discomfort after eating store bought bread find that long fermented sourdough style bread feels much lighter on their digestive system.
Additionally, this recipe is a fabulous zero waste kitchen strategy. Sourdough discard is frequently thrown away down the sink or into the compost bin during weekly starter feedings. By incorporating that discarded culture into a simple yeast dough, you reduce kitchen food waste while maximizing the value of your ingredients. The discard introduces a subtle, complex flavor depth that plain commercial yeast alone cannot achieve, giving you a delicious hybrid loaf that combines speed with deep rustic flavor.
| Benefit Category | Features and Advantages |
| Physical Effort | Zero manual kneading required, easy cleanup |
| Digestive Health | Reduced phytic acid, lower gluten stress, gentle on stomach |
| Waste Reduction | Uses up leftover unfed sourdough starter effectively |
| Taste Profile | Deep sourdough tang combined with airy yeast rise |
| Cost Efficiency | Uses basic cheap pantry staples like flour, water, and salt |
Extra Tips for Better Taste
To take your homemade loaf from great to extraordinary, consider applying these creative and practical improvement tips during your baking process:
- Add Savory Herbs and Garlic: Knead half a cup of roasted garlic cloves, fresh chopped rosemary, or dried oregano into the dough during the final shaping stage for an unbelievable savory aroma.
- Cheese Infusion: Mix in half a cup of shredded sharp cheddar cheese or grated parmesan cheese into the dry flour before adding liquids. The cheese melts into delicious gooey pockets throughout the baked crust.
- Seeded Crust Coating: Spritz the top of your shaped dough ball with a light mist of water right before baking, then sprinkle sesame seeds, poppy seeds, or sunflower seeds over the top for extra crunch and nutty flavor.
- Use Filtered Water: Tap water containing high levels of chlorine can slow down yeast growth and weaken sourdough cultures. Using filtered or spring water helps your dough rise higher and faster.
- Temperature Control: If your house is cold during winter months, place your dough inside an unlit oven with the interior oven light turned on. The small bulb creates a warm environment around 75 to 80 degrees Fahrenheit, ideal for steady rising.
Final Thoughts
Baking a fresh loaf of artisan bread at home does not have to be a complicated or intimidating project. This easiest no knead sourdough discard bread recipe brings pure bakery quality results straight into your home kitchen with minimal active effort. By combining basic pantry staples with long rest times, you transform simple ingredients into a golden rustic loaf featuring a light crumb and a crispy crust. It is a wonderful feeling to pull a steaming hot, fragrant loaf out of your own oven while knowing every clean ingredient that went into making it. Give this recipe a try this weekend, share a thick warm slice with your loved ones, and enjoy the wonderful joy of simple home baking.
Nutrition Details
Here is the approximate nutritional breakdown for the complete loaf and per individual slice, assuming the loaf is cut into ten equal slices:
| Nutrient Category | Total Recipe (Whole Loaf) | Per Serving (1 Slice) |
| Calories | 1650 kcal | 165 kcal |
| Carbohydrates | 340 grams | 34 grams |
| Dietary Fiber | 12 grams | 1.2 grams |
| Sugars | 2 grams | 0.2 grams |
| Protein | 48 grams | 4.8 grams |
| Total Fat | 5 grams | 0.5 grams |
| Saturated Fat | 0.8 grams | 0.08 grams |
| Sodium | 3900 milligrams | 390 milligrams |
| Potassium | 450 milligrams | 45 milligrams |
Disclaimer
The nutritional information provided in this article is an estimate calculated using standard ingredient databases and typical portion sizes. Actual nutritional values may vary depending on specific flour brands, exact measurements, and individual preparation methods used in your kitchen. Every individual body responds differently to different foods, gluten levels, and fermentation times. If you have specific medical conditions, severe gluten allergies, celiac disease, or special dietary requirements, please consult with a qualified health professional or registered dietitian before making significant changes to your daily diet.