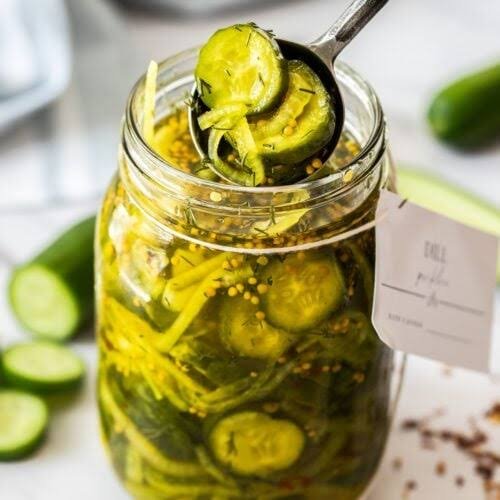
Canning cucumber dill pickles at home is one of the most rewarding kitchen projects you can ever start. When you make your own pickles, you take simple fresh cucumbers from the garden or local market and turn them into crunchy, tangy, flavorful bites that last for months. There is something truly special about opening a jar of homemade pickles in the middle of winter and smelling that rich garlic and dill aroma. Fresh cucumbers have a natural sweetness and crisp texture that pairs beautifully with strong vinegar, aromatic dill seeds, fresh garlic cloves, and coarse salt. Pickling is an ancient tradition that has brought families together for generations because it preserves the abundance of summer for rainy days. Once you taste a truly fresh homemade dill pickle, you will realize that store bought versions simply cannot compare in crunch or flavor. Learning how to preserve your own food gives you complete control over every single ingredient that enters your body. You do not have to worry about unwanted chemical additives, artificial colors, or strange preservatives that are often found in commercial jars on grocery store shelves.
People all over the world love this pickle recipe because it offers an incredible balance of tartness, saltiness, and herbal freshness. Every single bite delivers a satisfying crunch that makes snack time so much more enjoyable. Pickles are extremely versatile in the kitchen, making them a staple in households everywhere. You can slice them up to put on hot burgers, chop them fine for rich potato salads, layer them inside cold sandwiches, or simply eat them straight out of the jar when you want a low calorie snack. The bright green color of freshly canned pickles inside a clear glass jar looks beautiful on any kitchen pantry shelf. Many people fall in love with pickling because it turns simple gardening efforts into lasting rewards that can be shared with friends and family. Gifting a handmade jar of dill pickles decorated with a nice ribbon is one of the warmest ways to show someone you care. The crisp texture combined with the bold punch of garlic and dill creates a flavor profile that appeals to both young children and adults alike.
Making these canned cucumber dill pickles is perfect for moments when you want to connect with food in a deeper, more mindful way. Summer and early autumn are the absolute best times to make this recipe because pickling cucumbers are abundant, cheap, and extremely fresh. If you grow your own vegetables, you know how fast cucumber plants produce fruit, and pickled preservation prevents any of your hard work from going to waste. People also love making pickles for fitness and health reasons because pickles are naturally low in calories and fat while being packed with flavor. Eating a juicy dill pickle can satisfy cravings for crunchy, salty snacks without ruining a balanced diet. The pickle brine is even used by active athletes to help prevent muscle cramps after intense workouts due to its sodium content. Beyond fitness, making pickles is an emotional experience that brings back sweet memories of grandparents working in warm summer kitchens. Taking time out of a busy weekend to slice cucumbers and fill jars is a wonderful form of self care that leaves you with a feeling of deep accomplishment.
Starting your pickling journey does not require expert cooking skills or expensive equipment, which is why this recipe is ideal for total beginners. All you need are a few basic ingredients, some glass jars with proper lids, and a large pot of boiling water. The process of heating the jars in a hot water bath creates a safe vacuum seal that keeps the pickles fresh and safe to eat for up to a full year. As you gain practice, you will feel more confident customizing the garlic, dill, and spice levels to match your exact taste preferences. Preparing your own food gives you a wonderful feeling of independence and food security. Every step of the process, from washing the bumpy green cucumbers to hearing the cheerful pop of the jars sealing on the counter, brings joy and satisfaction. By following simple guidelines for hygiene and acidity, you can create delicious pickles that are safe, healthy, and incredibly tasty. This guide will walk you through everything you need to know to achieve crunchy, perfect results every single time.
Ingredients You Will Need
To create the best canned cucumber dill pickles, you must start with high quality ingredients. The freshness of your cucumbers directly affects the final crunch of your pickles.
-
Kirby or Pickling Cucumbers: 8 pounds (Choose small to medium sized cucumbers that are firm, bright green, and bumpy. Avoid large yellowing cucumbers because they have soft seeds and watery flesh.)
-
White Distilled Vinegar: 6 cups (Ensure the vinegar has 5 percent acidity, which is required for safe home canning.)
-
Pure Water: 6 cups (Filtered or non chlorinated water works best so minerals do not discolor the pickles.)
-
Pickling Salt or Canning Salt: one half cup (Do not use iodized table salt because it will make the brine cloudy and turn the pickles dark.)
-
Fresh Dill Heads or Fresh Dill Weed: 8 large sprigs or 8 whole dill heads (Fresh dill provides the best flavor, but 4 tablespoons of dried dill seed can be used as an alternative.)
-
Fresh Garlic Cloves: 16 whole cloves (Peeled and lightly smashed to release natural aromatic oils.)
-
Whole Black Peppercorns: 4 teaspoons (Whole peppercorns add a mild, warm background spice.)
-
Mustard Seeds: 4 teaspoons (Yellow or brown mustard seeds add traditional pickling aroma and deep flavor.)
-
Red Pepper Flakes: 2 teaspoons (Optional, if you prefer a subtle spicy kick in your pickles.)
-
Pickle Crisp Granules or Calcium Chloride: 2 teaspoons (Optional, helps maintain maximum crunchiness during heat processing.)
Step By Step Method
Preparing the Cucumbers and Jars
First, clean your work station thoroughly. Wash all 8 pounds of pickling cucumbers under cold running tap water. Use a soft vegetable brush to gently scrub away any dirt or tiny prickles from the cucumber skin. Rinse them well and place them on clean cotton towels to dry. Cut off one sixteenth of an inch from the blossom end of every single cucumber. The blossom end contains natural enzymes that can make pickles soft, so removing it ensures a firm texture. You can leave the cucumbers whole if they are tiny, or slice them into thick rounds, long spears, or halves depending on your preference.
Next, wash 8 pint sized glass canning jars in warm soapy water. Rinse them completely to remove all soap residue. Place the clean jars inside a large water bath canner filled with hot water. Keep the water hot over low heat so the jars remain warm. Heating the jars prevents them from cracking when hot brine is poured inside later. Place your brand new flat canning lids into a bowl of warm water to soften the rubber sealing rings.
Preparing the Pickling Brine
Combine 6 cups of white distilled vinegar, 6 cups of pure water, and one half cup of pickling salt in a large stainless steel pot. Do not use iron or copper pots because reactive metals can alter the pickle color and taste. Turn the stove heat to medium high and bring the liquid mixture to a full rolling boil. Stir the liquid gently with a wooden spoon until all salt crystals dissolve completely into the brine. Once the brine is boiling and clear, lower the heat slightly to keep it hot while you pack your jars.
Packing the Jars with Flavor
Carefully lift one hot glass jar out of the hot water bath using jar tongs, letting excess water drain back into the pot. Place the warm jar on a clean wooden board or folded towel to protect your countertop from heat damage. Place the aromatic spices directly into the bottom of the warm jar. For each pint jar, add 2 smashed garlic cloves, 1 teaspoon of whole black peppercorns, 1 teaspoon of mustard seeds, one quarter teaspoon of red pepper flakes if using, and 1 large sprig of fresh dill. If you are using pickle crisp granules, add one quarter teaspoon per pint jar now.
Now, pack the prepared cucumber pieces tightly into the jar on top of the spices. Pack them as snugly as possible without crushing the flesh. A tight pack prevents the cucumbers from floating to the top once the hot liquid is added. Leave about one half inch of empty space between the top of the cucumbers and the rim of the jar.
Adding the Hot Brine
Ladle the hot boiling brine carefully over the packed cucumbers in the jar. Use a non metallic funnel to prevent spills on the jar rim. Fill the jar with brine, leaving exactly one half inch of headspace at the top. Headspace is the empty space between the top of the brine and the top rim of the jar, which is essential for creating a proper vacuum seal.
Slide a clean wooden utensil or plastic bubble remover tool down the inside edges of the jar. Gently press the cucumbers to release any trapped air bubbles. Recheck the liquid level and add a tiny bit more hot brine if needed to maintain the one half inch headspace.
Sealing and Processing the Jars
Wipe the top rim of the glass jar with a clean, damp paper towel to remove any sticky liquid or salt residue. Any leftover food on the rim will prevent the lid from sealing correctly. Place a warm flat lid directly onto the center of the clean jar rim. Screw a metal jar band over the lid until it is fingertip tight. Do not overtighten the band because air must escape during the heating process.
Use jar tongs to lower the filled jar gently into the hot water bath canner. Repeat the packing and filling steps for all remaining jars. Ensure the water level in the canner covers the tops of all jars by at least 1 to 2 inches. Cover the large canner with its lid and bring the water to a rapid, full rolling boil over high heat.
Once the water reaches a full boil, start your timer. Process pint jars in boiling water for 10 minutes. Adjust processing time if you live at high altitudes by adding extra minutes according to standard home canning safety charts.
Cooling and Storing Your Pickles
When the processing time is complete, turn off the stove heat. Remove the canner lid carefully away from your face to avoid hot steam burns. Let the jars sit inside the hot water for 5 minutes to adjust to the temperature change.
Use jar tongs to lift each jar straight up out of the water. Do not tilt the jars. Place them upright on a thick towel in a draft free room. Allow the hot jars to cool undisturbed for 12 to 24 hours. As the jars cool, you will hear a distinct popping sound, which indicates that a vacuum seal has been formed.
After 12 hours, test the seals by pressing the center of each metal lid. If the lid stays flat and does not flex up or down, the jar is successfully sealed. Remove the metal bands, gently wipe the outside of the glass jars, and label them with the recipe name and date. Store sealed jars in a cool, dark, dry pantry. Allow the pickles to rest for at least 2 weeks before opening so the flavor penetrates deep inside the cucumbers.
Why This Recipe Is Special
This homemade dill pickle recipe stands out because it delivers an unbeatable balance of flavor, crispness, and pure wholesome ingredients. Unlike commercial varieties that rely on chemical preservatives, artificial yellow dyes, and excess sugar, this recipe uses simple natural items. The combination of white vinegar, clean water, pickling salt, fresh dill, and garlic creates a clean, classic flavor profile that tastes fresh from the farm.
Health conscious eaters love this recipe because pickles are naturally low in calories, sugar free, and fat free. Cucumbers contain essential vitamins and minerals, while garlic and dill offer natural antioxidant benefits. The fermentation and vinegar brine also provide digestive benefits by stimulating digestive juices. Eating homemade pickles allows you to control the quality of salt used, eliminating undesirable additives commonly found in factory made pickles.
Another factor that makes this recipe special is the incredible texture achieved through proper techniques. By removing the blossom ends and using fresh cucumbers, you get a crisp bite that feels fresh every single time. Making your own preserves gives you a wonderful feeling of pride whenever you serve a delicious batch to guests or enjoy a quick homemade snack.
Extra Tips for Better Taste
-
Pick Cucumbers Early: Always process cucumbers on the same day they are harvested. Freshly picked cucumbers have maximum water pressure inside their cells, which translates to a firmer pickle.
-
Use Whole Spices: Avoid using ground spices like ground garlic or powdered dill. Ground spices make the brine dark and muddy, whereas whole seeds release clean flavor slowly over time.
-
Keep Brine Hot: Always keep your vinegar brine boiling hot when pouring it over cold or room temperature cucumbers. Hot liquid penetrates cucumber skin better and ensures proper thermal processing.
-
Cool Jars Slowly: Never place hot processed jars on cold tile or granite surfaces, or near open windows. Rapid temperature changes can shatter glass or ruin the vacuum seal.
-
Adjust Garlic and Pepper: If you love intense garlic flavor, double the garlic cloves in each jar. If you prefer a milder taste, reduce the garlic and omit red pepper flakes completely.
-
Use Pure Water: Chlorinated tap water can cause pickles to turn dark or develop strange off flavors. Always use distilled or filtered bottled water for your brine.
Final Thoughts
Canning your own cucumber dill pickles is a rewarding kitchen activity that brings joy, savings, and delicious food into your home. The simple combination of fresh cucumbers, garlic, dill, and tangy brine creates a snack that everyone loves to eat. With a little patience and attention to clean cooking habits, anyone can master this traditional skill. Open a jar during your next family meal, share a few with neighbors, and enjoy the crisp taste of summer all year long.
Nutrition Details
Here is the estimated nutritional breakdown per serving of canned cucumber dill pickles. One serving is equal to approximately two pickle spears or 30 grams of pickled cucumbers.
Disclaimer
Everyone’s body and health needs are unique, so individual nutritional responses may vary depending on personal diet, activity level, and medical conditions. The nutritional details provided above are approximate estimations calculated for standard ingredients. If you follow a strict low sodium diet or have existing medical issues like hypertension, consult a qualified healthcare professional before consuming food items preserved with salt. Always practice proper food handling hygiene and safe home canning techniques to ensure your preserves remain safe for consumption.