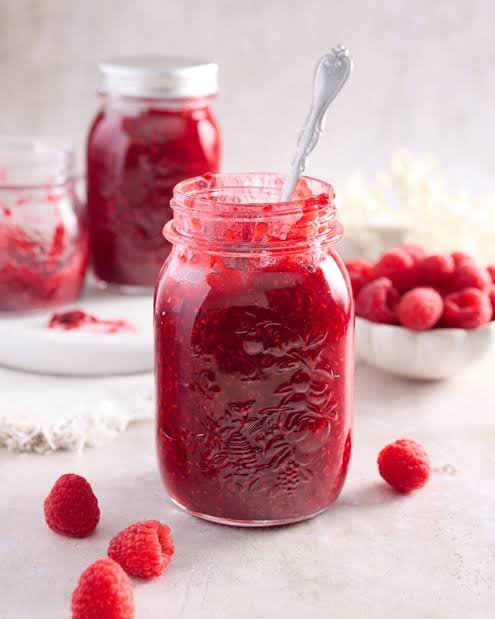
Making your own fruit preserves at home is one of the most rewarding kitchen projects you can ever start. This easy raspberry jam canning recipe is designed to help you capture the absolute fresh taste of ripe berries without burying their natural flavor under tons of extra white sugar. Traditional jams often require equal amounts of fruit and sugar to set properly, which can make the finished spread taste more like pure candy than real fruit. This low sugar version focuses on highlighting the natural tartness and rich sweetness of real raspberries while keeping the preparation process simple and beginner friendly. By using low sugar pectin, you get a beautiful spreadable consistency without needing to boil the fruit down for hours or add pounds of extra sweetening agents. Anyone can master this recipe in a single afternoon, even if you have never tried water bath canning before in your entire life.
People all over the world fall in love with this recipe because it allows the genuine flavor of fresh raspberries to shine through in every single spoonful. Standard store bought jams are often packed with high fructose corn syrup and artificial preservatives that completely dull the bright taste of the berries. When you make this recipe at home, you have total control over every single item that goes into your jar. The natural deep red color of the raspberries stays remarkably vibrant, and the texture comes out perfectly soft, smooth, and easily spreadable on your favorite breakfast foods. Friends and family always appreciate receiving a handmade jar of fresh jam as a thoughtful gift because it shows real care and effort. Once you experience the incredible difference in quality and taste between homemade low sugar jam and commercial brands, you will never want to buy grocery store preserves again.
There are so many wonderful occasions throughout the entire year to prepare a batch of this delicious low sugar jam. During the warm summer months when fresh raspberries are plentiful, cheap, and at their absolute peak of ripeness, canning is the ultimate way to store that summer sunshine for the colder days ahead. Opening a fresh jar in the middle of winter brings back warm memories of summer gardens and bright sunny mornings. From a fitness and wellness perspective, reducing your daily intake of refined sugar is a great step toward better overall health without forcing you to give up your favorite sweet treats. This recipe is perfect for fitness conscious individuals, busy parents who want healthier options for their kids, or anyone who enjoys eating whole foods with minimal artificial additives. It turns morning toast, oatmeal bowls, and afternoon snacks into a nourishing experience that you can feel truly good about eating.
Cooking this jam is also a deeply soothing and emotional activity that brings a sense of slow, peaceful crafting into your busy daily routine. The wonderful sweet aroma of simmering berries filling your entire kitchen creates an inviting and cozy atmosphere that immediately feels like home. Preparing jars of homemade jam connects you to traditional kitchen skills while giving you full creative freedom over your daily meals. It is a fantastic weekend project that you can do completely on your own for some quiet relaxation or share with your children to teach them how real food is made from scratch. Every step of the canning process, from washing the fresh fruit to hearing the satisfying small pop sound of the jar lids sealing tight on the counter, brings a genuine sense of pride and accomplishment that brightens up your whole day.
Ingredients You Will Need
To make this delicious low sugar raspberry jam successfully, you need to gather the following ingredients and kitchen supplies:
- Fresh or frozen raspberries: 8 full cups of fresh raspberries or thawed frozen raspberries
- Low sugar or no sugar needed powdered pectin: 1 full box, usually about 1.75 ounces
- Granulated white sugar: 1.5 cups of pure granulated sugar, or you can use raw cane sugar
- Fresh lemon juice: 2 tablespoons of freshly squeezed lemon juice
- Pure water: 0.5 cup of clean water
- Unsalted butter: 0.5 teaspoon of pure butter to reduce foaming during boiling, which is optional
Step by Step Method
Following these clear and straightforward instructions will ensure your raspberry jam turns out perfectly set, colorful, and delicious every single time.
Step 1: Prepare Your Kitchen Equipment
Before you start cooking the fruit, you need to get all your canning tools and glass jars ready. Wash your glass mason jars, metal rings, and new flat lids in warm water with mild dish soap. Rinse them thoroughly with clean water. Place a large canning pot fitted with a rack on your stove, fill it halfway with water, and submerge your clean jars inside. Bring the water to a gentle simmer to keep the jars hot until you are ready to fill them. Keeping your jars warm prevents them from cracking when you pour hot jam inside later. Place your flat lids in a small bowl of warm water so the rubber sealing rings become soft and flexible.
Step 2: Prepare the Raspberries
Take your fresh raspberries and place them in a colander. Rinse them gently under cold running water to remove any dust, dirt, or tiny garden debris. Let the water drain away completely. If you are using frozen berries, let them thaw out completely at room temperature in a large bowl, making sure to keep all the natural juices that release as they thaw. Transfer the berries into a large wide bowl. Use a potato masher or a strong fork to crush the raspberries until you reach your desired texture. Some people love big chunks of fruit in their jam, while others prefer a smoother texture.
Step 3: Mix the Fruit and Low Sugar Pectin
Measure exactly 8 cups of your crushed raspberries and pour them into a large, heavy bottomed stockpot. Heavy bottomed pots are best because they spread the heat evenly and stop the fruit from scorching or burning on the bottom. Add the 0.5 cup of clean water and the 2 tablespoons of fresh lemon juice directly into the crushed fruit. Open your box of low sugar pectin. Take out 0.25 cup of your measured sugar and mix it thoroughly with the dry pectin powder in a small dish. Stirring pectin with a little bit of sugar first prevents the pectin from clumping up when you add it to the liquid fruit mixture. Pour the pectin mixture into the fruit pot and stir well until fully dissolved.
Step 4: Bring the Fruit to a Full Boil
Place your stockpot over high heat on your stovetop. Stir the fruit mixture continuously with a long wooden spoon or heat resistant spatula as it warms up. Add the 0.5 teaspoon of unsalted butter at this point if you want to prevent foam from forming on top of the boiling jam. Continue stirring constantly until the raspberry mixture reaches a full rolling boil. A full rolling boil means the liquid boils vigorously and the bubbles cannot be stirred down or stopped when you stir the pot.
Step 5: Add the Remaining Sugar
As soon as the mixture reaches a hard rolling boil, pour in the remaining 1.25 cups of granulated sugar all at once. Stir the pot constantly to dissolve the sugar completely. Keep stirring non stop over high heat and bring the entire mixture back up to a second hard rolling boil. Once it reaches a hard rolling boil again, start a timer and let it boil for exactly 1 full minute, continuing to stir without stopping during this entire minute. Boiling for one full minute activates the pectin so your jam sets correctly. After 1 minute passes, immediately remove the pot from the heat source.
Step 6: Skim and Fill the Jars
If there is any foam sitting on top of your hot jam, gently skim it off using a wide metal spoon and discard it. Carefully lift your hot mason jars out of the warm water bath using jar tongs, letting any excess water drip back into the pot. Place the hot jars on a clean kitchen towel laid flat on your counter. Place a canning funnel into the top of the first hot jar. Ladle the boiling hot raspberry jam into the jar, leaving exactly 0.25 inch of space at the very top. This empty space is called headspace, and it allows the jam to expand slightly during the canning process without breaking the seal.
Step 7: Clean the Rims and Apply Lids
Take a clean paper towel dampened with warm water and carefully wipe the top rim and outer threads of each filled glass jar. Removing any sticky jam residue from the rim is extremely important because any left behind fruit bits will prevent the rubber lid from creating an airtight seal. Place a warm, softened metal lid flat onto the center of each jar rim. Screw the metal band or ring over the lid until it is finger tip tight. Finger tip tight means you turn the band until you feel resistance, but you do not force it down super tight with your full strength, as air needs to escape during processing.
Step 8: Process the Jars in Water Bath
Use your jar tongs to lower the filled jars carefully back into the pot of hot water. Make sure the hot water covers the tops of the jars by at least 1 full inch. If the water level is too low, add more hot water from a kettle. Place the lid on the canning pot and turn the heat to high. Once the water comes to a rolling boil, start your processing timer. Process half pint jars in the boiling water for 10 full minutes. If you live at a high altitude above 1000 feet, you will need to add extra processing time according to standard altitude guidelines.
Step 9: Cool and Test the Seals
When the processing time is finished, turn off the burner and remove the pot lid. Let the jars sit inside the hot water for 5 minutes to settle down. Using your jar tongs, lift the jars straight up out of the water without tilting them, and place them onto a dry kitchen towel on your counter. Leave at least 1 inch of space between each jar so air can circulate around them. Let the jars cool untouched at room temperature for 12 to 24 hours. As the jars cool down, you will hear a distinct, delightful popping sound coming from the metal lids. That sound means your jars have successfully sealed tight. After 12 hours, press the center of each lid. If the lid does not flex up or down, the jar is completely sealed and safe for long term pantry storage.
Why This Recipe Is Special
This low sugar raspberry jam recipe is truly special because it redefines what homemade fruit preserves can be. Traditional canning recipes often demand equal parts of sugar and fruit, which drowns out the genuine, vibrant taste of fresh berries. By drastically reducing the sugar content, this recipe highlights the natural, wholesome flavor of real raspberries while keeping the texture soft and luxurious. The addition of fresh lemon juice balances the sweetness with a tiny bite of acidity that brightens up the entire flavor profile, making every mouthful taste light and fresh.
From a health and wellness perspective, this recipe offers a wonderful alternative for anyone watching their daily intake of refined sugars. Standard commercial jams can contain up to 12 grams of added sugar or high fructose corn syrup in just one tablespoon. This version cuts those numbers down significantly, making it a much smarter choice for individuals who want to manage their energy levels and reduce unnecessary dietary calories. Raspberries themselves are naturally rich in dietary fiber, powerful antioxidants, and essential vitamins like vitamin C, which help support a strong immune system and overall vitality.
Another amazing benefit of this recipe is its pure simplicity and beginner friendly nature. Many traditional fruit jams require lengthy cooking times to reduce liquid through evaporation, which can cause the delicate fruit flavors to deteriorate under prolonged high heat. Thanks to modern low sugar pectin, this recipe comes together in under an hour from start to finish. You preserve all the nutritional benefits, radiant red color, and fresh aroma of raw raspberries without spending all day standing over a hot stove. It gives you maximum flavor and high quality nutrition with minimal effort.
Extra Tips for Better Taste
- Use a mix of fully ripe berries and slightly underripe berries for the best natural set and deep flavor balance
- Add a splash of pure vanilla extract right after removing the pot from heat for a warm, cozy aromatic twist
- Stir in a tiny pinch of ground cinnamon or ground cardamom to create a spiced raspberry jam for autumn mornings
- Substitute fresh lime juice instead of lemon juice to give the jam a bright tropical citrus accent
- Mash half the berries completely and tear the remaining half into large pieces for an amazing chunkier texture
- Always use bottled or freshly squeezed lemon juice to ensure proper consistent acidity levels for safe preservation
- Serve your finished jam over warm Greek yogurt, vanilla ice cream, or sharp cheddar cheese for exciting flavor pairings
Final Thoughts
Creating your own batch of low sugar raspberry jam is an empowering and deeply satisfying experience that brings incredible flavor into your daily routine. By taking control of the ingredients, you eliminate unnecessary processing and ultra refined sugars while preserving the true, glorious taste of fresh summer fruit. Whether you spread this delicious jam over warm morning toast, swirl it into oatmeal bowls, or give beautifully decorated jars as heartfelt gifts to loved ones, this recipe is sure to become a beloved favorite in your home kitchen. Enjoy every step of the simple canning journey and celebrate the joy of eating wholesome, homemade food.
Nutrition Details
Here is the full nutrition breakdown for the complete batch and per single serving size of this recipe.
Batch vs Serving Comparison
| Nutrient Type | Entire Jam Batch | Single Serving (1 Tbsp) |
| Total Calories | 1450 kcal | 22 kcal |
| Carbohydrates | 360 g | 5.5 g |
| Dietary Fiber | 52 g | 0.8 g |
| Total Sugars | 290 g | 4.4 g |
| Added Sugars | 300 g total sugar added | 4.5 g |
| Protein | 12 g | 0.2 g |
| Total Fat | 3 g | 0.05 g |
| Vitamin C | 240 mg | 3.6 mg |
| Calcium | 200 mg | 3.0 mg |
Additional Nutritional Values Per Serving
- Sodium: 2 mg
- Potassium: 45 mg
- Iron: 0.2 mg
- Vitamin A: 10 IU
- Cholesterol: 0 mg
Disclaimer
Everyone’s body is different and personal dietary responses may change based on individual health needs. The nutritional figures provided in this guide are estimates calculated using standard nutritional databases and may vary based on the specific brand of fruit or pectin used. This recipe is intended for general home cooking and instructional purposes. Always consult a qualified healthcare professional or certified nutritionist if you have specific dietary concerns, diabetes, or health conditions that require strict sugar monitoring.